Ghostwire: Tokyo – Boss
In our Boss Guide to Ghostwire: Tokyo Let's explain to you:
- Phase 1
- Phase two
- Phase 1
- Phase two
- Phase 1
- Phase two
- Phase 1
- Phase 2 and 3
- So you defeat Yaseotoko
- That's how your Ko-Omote defeats
- So you defeat Okina
- So you defeat Yaseotoko in the second fight
- So you defeat Hannya, Alias Hanngon
- How the five end opponents of the game behave and how you defeat them
- How to optimally prepare for the fighting
- Which rewards await you after every fight
Before we explain the strategy for every boss fight, two important information about preparation. Levelt in the context of history - as already described in our 10 tips and tricks for entry - especially your windweave skills , because this attack in almost all boss fighting very well serving you.
Also, prays in the open world on Jizo statues to increase your maximum magic ammunition. You have difficulty finding the statues? Then just visit a shrine, throw 500 Meika in the vapor box, pray that you will find another Jizo statue and you will see it on the map.
Buy Now Credit Card for PlayStation Network!
So you defeat Yaseotoko
Phase 1
As part of the main mission "Deep Under Earth" you meet the first big boss of the game: Yaseotoko. The muscular creature looks a bit like a oversized man's affix , but sets the same "essential weaving" attack maneuvers like KK.
In other words, you will do it here with a wider wind, wide-ranged water and much harm to make formering fire projectiles. From first-mentioned fires YaSotoko usually two to three, which you remember the best with sideways moves .
Not too close to Yasotoko's position, otherwise you will not get enough time to avoid. Still comes a projectile on you, then counters with a block to absorb as much damage as possible. According to its initial wind attacks, Yasotoko usually switches to water projectiles. Best antidote here: Ducks you, blocks simultaneously and goes directly to the counterattack after successful evasive maneuvers.
Subsequently, as soon as you see that Yaseotoko reconciles a fireball between his hands , you should either attack him directly (which can interrupt the attack) or dodge again. Perfect Block in Fire Projectiles is also possible, but requires good timing.
Between the attack phases, Yasotoko jumps into the air again and again and then draws back to the ground with a purple energy engine . Hardly landed, follows a butterfly, which triggers a rapidly spreading flame ring. This gives you the best jumping.
Phase two
Has the boss sufficiently damaged, he fits his tactics a bit and generates a shield in between to block your attacks. Wait shortly at this moment and continues your attack afterwards. Also pay attention to his powerful ramming attacks in this phase , which he performs with outstretched hand.
Important: As soon as you have assumed the ammunition of two types of attack, you should immediately break the ether objects on the edge of the arena to get new ether. However, this does not make this before, otherwise excess ammunition is lost. If you heal your wounds in a timely man and attack regularly, the fight is decided after a few minutes at your favor.
That's how your Ko-Omote defeats
Phase 1
At the beginning of the fight with Ko-Omote Akito and KK are separated from each other. So you can not attack the boss with your magicies and do not use KKS ghost view. To master the fight still swiftly, you should first cover with arrows . Run straight to a colorful billboard right after the start of the duel, move the pink particles from left to right.
Then turn left, the pass follows about to the middle and crawls left in the narrow ventilation shaft . There you will find some food next to two mines with arrows. Then leave the ventilation shaft (in the Ko-Omote can not enter) and give you an overview of the Bossiktragareal - absolutely pay attention to the exact positions of the red ether crystals.
Now pay attention to you, wait until Ko-Omote persecutes you and runs to one of the ether crystals. Once there, you apply your view towards the opponent, while at the same time you increase your distance to the ether crystal. Subsequently, precise timing is required: Picking the bow and shoots on the ether crystal as soon as Ko-Omote is nearby. The resulting explosion makes the boss briefly dazed.
Then run out Coming from behind on the opponent and goes so close to the appearance "Quick extinguishing" appears - with the L2 button you can snatch the first of the three cores.
Ko-Omote will jump on the roof and you have a short time to heal you and, if necessary, seek protection in the ventilation shaft in the Arenamitte. Care: Should you discover Ko-Omote in the hiding place, it challenges a poison cloud , in front of which she flees as soon as possible.
Phase two
 Follow the first hit into another area in which an ether crystal is located, Ko-Omote again attracts your position and repeatedly blind the "crystal blasted and then attacking behind" maneuver two more times to Remove the remaining two cores. Your basic behavior pattern does not change Ko-Omote. If you have the shoot out, the fight is simpler than thought.
It becomes more problematic only when you go out the arrows and / or the ether crystals. In this case, a lot of patience is in demand, because once consumed objects do not appear again after a certain time again.
An important tip: One of the ether crystals is located directly on exit of a ventilation shaft and can be brought out of the hiding place to explosion. As a reward for the warned fight, you will be united again with KK and gets 500 experience points as well as the music piece Ko-Omote.
So you defeat Okina
Phase 1
Before you fall into the fight against spider spirit okina, you should fill all your ranged attacks and carry enough food. Activated right after the start of the fight KKS ghosts view to find Okinas weak points. These are located in the head area and on the lower body, about the height of the middle two arms.
Changes to the wind lotus magic and opens the fire on the hit zones as soon as the opportunity gives it. While she attacks, Okina will move to the pelle with various maneuvers. Let's start with a large-scale wiping movement with the right pranish, which best dodges you.
In the second attack phase, Okina holds two of his eight limbs praying into the air, forming an energy ball and smashes it with full force to the ground. The result is two pressure waves , which you only relieve successfully if you jump up shortly before the collision with the pressure wave.
Directly afterwards you coincide Okina with three bundled thread projectiles. Block this and then places you on one of the boulders , which fell through the butterflies on the floor. From there, continue to attack the vulnerabilities and ignores the next, now with only one stroke triggered pressure shaft. Unless you stand correctly on the stone, you can not harm you.
Phase two
Attacks Okina until it returns both arms in the air and for a double strike . The latter usually has such a force that the stone that protects you from the pressure waves is destroyed. Caution is also offered in front of Okinas outlined prank-wiping movement, because it destroys them on a strike all the stone platforms located on the ground.
After one to two minutes of continuous attacks you will certainly go out the magiemunition - you will find further ether objects in the small, of cobwebs hidden caves right and left at the edge of the Bossikartena. A large amount of ether will also be produced as soon as your Okina has snapped the first of two cores.
In the second phase of the struggle, you should also be taken to poison clouds, which cause it to damage their affected arenas. Professional tip Finish: Concentrates you in the first phase on it, to inflow both cores . This makes this portion noticeably in the length, in the second - clearly hectic and more dangerous phase - are all the more faster at the target.
So you defeat Yaseotoko in the second fight
In the fifth chapter you have to compete again another time against YaSeotoko. The good news in advance: The fight runs in large parts like the first showdown. Again, you can do it again with wind, water and fire magic, which dies you either (as described above) or that blocks. In contrast to the first fight, however, Yasotoko uses very early on additional rammings and its circular shield.
The latter is best deactivated with a charged fire projectile . The decisive in this struggle remains that after successful blocks or evasive maneuvers, it is immediately precipitated and the boss - as he charges his own attacks - as much life energy as possible.
Did you remove Yasotoko's first core, followed a second phase for which the boss conjures glowing flames everywhere on his body. That looks a fear of fear and strengthens its attacks, but does not make him immune to your wind lotus magic.
It is all the more important that you can keep the boss continuously with attacks. However, increases your distance even further, because shortly before its decline, Yasotoko reinforces massive fluidets that remove particularly much energy.
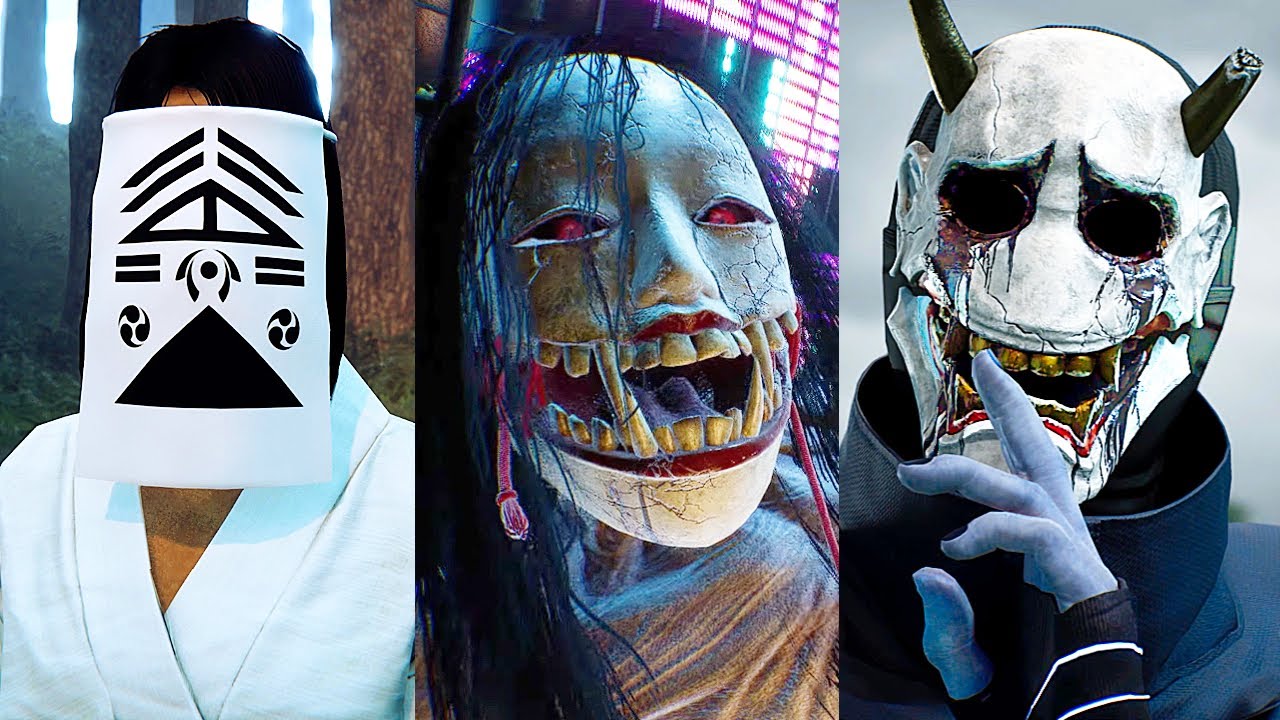
So you defeat Hannya, Alias Hanngon
Phase 1
In the last boss fight of the game, Hannya presents itself - then Hanngon called - as a fish-like ghost collection with three masked heads. To bring him to the track, you must first cover each of the three masks with a variety of attacks. Uses the best wind weave, while the endboss moves around you quickly. If he stands right in front of you, all three magic species are suitable.
Try to improve his different attack patterns and react accordingly. The following actions await you:
- Hangon stops briefly, faints and unleashes a wind jet in a radius of 180 degrees. Stop sufficient distance in this phase and blocks immediately. Directly thereafter, it takes a few seconds before the final boss puts back in motion. Uses this opportunity to align immediately.
- Hanngon grows a several meter long arm on both sides with a huge hand. A short time later, he struggles both hands in height , just to skid them to the ground directly afterwards. Removes you quickly from the impact zone of the hands and jumps into the air, just before tearing the shock wave at the bottom of the feet.
- Hanngon relies on with his arms and Krabbelt then lightning fast on you. Run backwards as soon as you notice this maneuver and fires in the optimal fall on the mask to your left.
- The boss brains up briefly and then rams his head into the shallow water, whereupon hands appear everywhere who grab after you. You can not hold you permanently in a place, but noticeably get out and weaken. Again, fast dodging is in demand. As soon as the hands withdraw, you have a short time window for counterattacks.
Try to come on when dodging regularly behind the boss , as you can make such the back mask better - there is room for maneuvering in this arena. At ammunition deficiency, the various ether objects help continue scattered everywhere in the level.
Phase 2 and 3
As soon as you expose one of the cores and remove, Hangon disappears for some time and sends a troop visitor , which attack you immediately. In this case, only the faint opponents turn off and then the stronger. Lift up anesthesia and weakening valismans for particularly tough enemies. If you have caught a strong adversary with an anesthetic valisman, runs quickly behind him, leaving the core.
As soon as Hanngon looks like again, the strategies outlined is followed. Heil-items are particularly important in this fight - packs sufficiently. At this duel, keep the resonance display at the bottom right in the picture in the picture and sets it either against several visitors or against the boss itself if it is close to you. Something patience and precision assuming at aiming, Hannya gives small at about six to eight minutes.
As a reward for the won fight, you will receive the ghost chain , the ghosts collected - without detour via a telephone booth - in security. It is thus much faster possible to collect all missing spirits in the endgame.
Other guides to Ghostwire: Tokyo:
- Ghostwire: Tokyo - collect all trophies and get platinum
- Ghostwire: Tokyo - 10 tips and tricks for entry
- Ghostwire: Tokyo - find all 25 Tanuki
Visits us Facebook and Instagram and discuss with us about your favorite games!


Comments
Post a Comment